Integrate Firebase Cloud Messaging FCM on Android
In the early time, Google was announced C2DM service for sending message downstream to client application. C2DM has many weakness so GCM Google Cloud Messaging come out for the replacement to improve the service. Now, the latest Firebase Cloud Messaging has inherits all the features of Google Cloud Messaging and adding some new features on it. It is a new messaging service that suggest to migrate from GCM or C2DM. In this tutorial, I will tell you how to integrate Firebase cloud messaging fcm on android to send downstream push notification to client side application.
Creating a New Project
1. Open Android Studio IDE in your computer.
2. Create a new project and Edit the Application name to “FirebasePushNotificationExample”.
(Optional) You can edit the company domain or select the suitable location for current project tutorial. Then click next button to proceed.
3. Select Minimum SDK (API 15:Android 4.0.3 (IceCreamSandwich). I choose the API 15 because many android devices currently are support more than API 15. Click Next button.
4. Choose “Empty Activity” and Click Next button
5. Lastly, press finish button.
Add project in Firebase Console
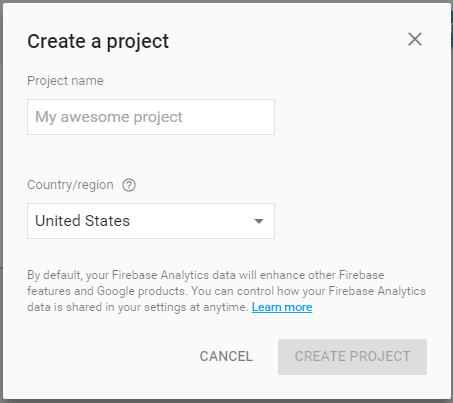
Go to Firebase console https://console.firebase.google.com/ and create a new project. Enter your project name and select which country you live.
Add firebase to Android App
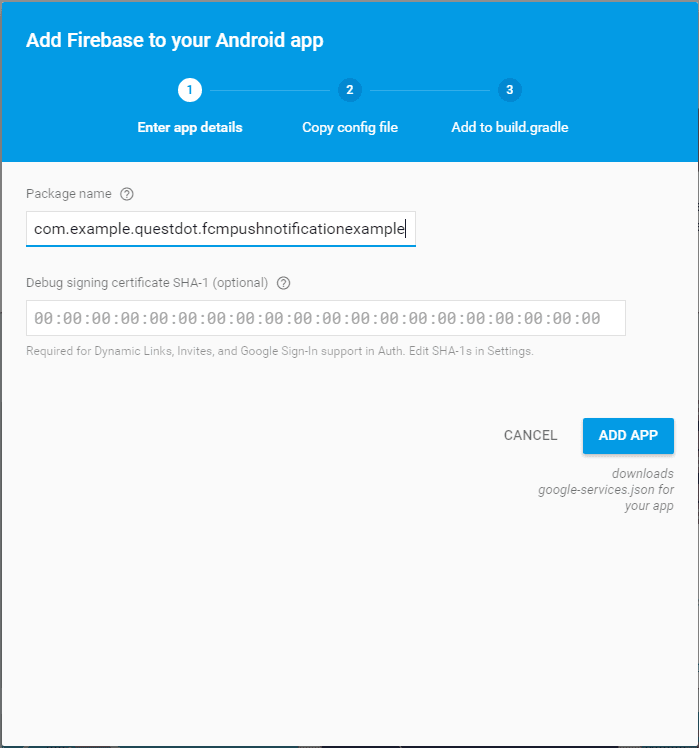
Inside the project control panel select add firebase to android app. Enter your android project and copy the package name into the firebase console package name section. After that click Add app button.
Move google-services.json into your project
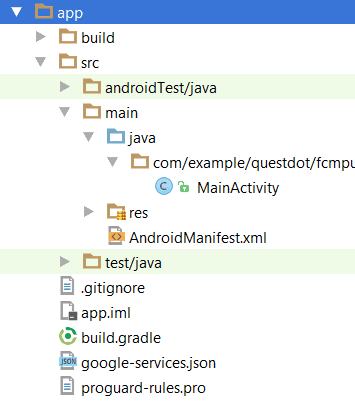
It will automaticaly download a json file into your computer. Then switch to the Project view in Android Studio to see your project root directory and move the it into your Android app module root directory.
Edit build.gradle
In the project-level build.gradle add the following line.
buildscript {
  dependencies {
    // Add this line
    classpath 'com.google.gms:google-services:3.0.0'
  }
}
After that go to your app-level build.gradle, apply the plugin and add a new dependency
This show insert below the dependency if not it will occur error.
dependencies{
compile 'com.google.firebase:firebase-messaging:9.2.1'
}

apply plugin: 'com.google.gms.google-services'
Now, you can synchronize your android project.
Edit AndroidManifest.xml
Add two firebase services in your application so that you can get Token and notification from firebase cloud server.
<!-- [START firebase_service] -->
<service android:name=".MyFirebaseMessagingService">
    <intent-filter>
        <action android:name="com.google.firebase.MESSAGING_EVENT" />
    </intent-filter>
</service>
<!-- [END firebase_service] -->
<!-- [START firebase_iid_service] -->
<service android:name=".MyFirebaseInstanceIDService">
    <intent-filter>
        <action android:name="com.google.firebase.INSTANCE_ID_EVENT" />
    </intent-filter>
</service>
Create a two new class for FirebaseInstanceIDService and FirebaseMessagingService
Right click your package name > New > Java class. Name it to MyFirebaseInstanceIDService. After that, create another java class name it to MyFirebaseMessagingService. Both services name should be same as the name define in the androidmanifest.xml.
Edit MyFirebaseInstanceIDService.java class
Go to the MyFirebaseInstanceIDService that just create, edit it to the following source code. This file is to get the Token from current user that register to the firebase server.
import android.util.Log;

import com.google.firebase.iid.FirebaseInstanceId;
import com.google.firebase.iid.FirebaseInstanceIdService;


public class MyFirebaseInstanceIDService extends FirebaseInstanceIdService {

    private static final String TAG = "MyFirebaseIIDService";

    @Override
    public void onTokenRefresh() {
        // Get updated InstanceID token.
        String refreshedToken = FirebaseInstanceId.getInstance().getToken();
        Log.d(TAG, "Refreshed token: " + refreshedToken);


    }


}
Edit MyFirebaseMessagingService.java class
Then go to the MyFirebaseMessagingService and edit the class. This file is to get the message from the firebase server and the message will put it to the notification.
import android.app.NotificationManager;
import android.app.PendingIntent;
import android.content.Context;
import android.content.Intent;
import android.media.RingtoneManager;
import android.net.Uri;
import android.support.v4.app.NotificationCompat;
import android.util.Log;

import com.google.firebase.messaging.FirebaseMessagingService;
import com.google.firebase.messaging.RemoteMessage;

public class MyFirebaseMessagingService extends FirebaseMessagingService {

    private static final String TAG = "MyFirebaseMsgService";


    @Override
    public void onMessageReceived(RemoteMessage remoteMessage) {

        Log.d(TAG, "From: " + remoteMessage.getFrom());

        if (remoteMessage.getData().size() > 0) {
            Log.d(TAG, "Message data payload: " + remoteMessage.getData());
        }

        // Check if message contains a notification payload.
        if (remoteMessage.getNotification() != null) {
            Log.d(TAG, "Message Notification Body: " + remoteMessage.getNotification().getBody());
        }

        sendNotification(remoteMessage.getNotification().getBody());
    }

    private void sendNotification(String messageBody) {
        Intent intent = new Intent(this, MainActivity.class);
        intent.addFlags(Intent.FLAG_ACTIVITY_CLEAR_TOP);
        PendingIntent pendingIntent = PendingIntent.getActivity(this, 0 /* Request code */, intent,
                PendingIntent.FLAG_ONE_SHOT);

        Uri defaultSoundUri= RingtoneManager.getDefaultUri(RingtoneManager.TYPE_NOTIFICATION);
        NotificationCompat.Builder notificationBuilder = new NotificationCompat.Builder(this)
                .setSmallIcon(R.mipmap.ic_launcher)
                .setContentTitle("FCM Message")
                .setContentText(messageBody)
                .setAutoCancel(true)
                .setSound(defaultSoundUri)
                .setContentIntent(pendingIntent);

        NotificationManager notificationManager =
                (NotificationManager) getSystemService(Context.NOTIFICATION_SERVICE);

        notificationManager.notify(0 /* ID of notification */, notificationBuilder.build());
    }
}
Edit activity_main.xml layout
This layout display two button which are subsribe button and get token button.
<LinearLayout xmlns:android="http://schemas.android.com/apk/res/android"
    xmlns:tools="http://schemas.android.com/tools"
    android:layout_width="match_parent"
    android:layout_height="match_parent"
    android:orientation="vertical"
    android:paddingBottom="@dimen/activity_vertical_margin"
    android:paddingLeft="@dimen/activity_horizontal_margin"
    android:paddingRight="@dimen/activity_horizontal_margin"
    android:paddingTop="@dimen/activity_vertical_margin"
   >


    <Button
        android:id="@+id/subscribeButton"
        android:layout_width="wrap_content"
        android:layout_height="wrap_content"

        android:layout_marginTop="20dp"
        android:text="Subscribe"
        android:layout_gravity="center_horizontal" />

    <Button
        android:id="@+id/logTokenButton"
        android:layout_width="wrap_content"
        android:layout_height="wrap_content"

        android:text="Get Token"
        android:layout_gravity="center_horizontal" />

</LinearLayout>
Edit MainActivity.java class
In this class, add button listener to both button to perform specific functionality. You can try it later.
import android.support.v7.app.AppCompatActivity;
import android.os.Bundle;
import android.util.Log;
import android.view.View;
import android.widget.Button;

import com.google.firebase.iid.FirebaseInstanceId;
import com.google.firebase.messaging.FirebaseMessaging;

public class MainActivity extends AppCompatActivity implements View.OnClickListener{

    @Override
    protected void onCreate(Bundle savedInstanceState) {
        super.onCreate(savedInstanceState);
        setContentView(R.layout.activity_main);

        Button subscribeButton = (Button) findViewById(R.id.subscribeButton);
        subscribeButton.setOnClickListener(this);

        Button logTokenButton = (Button) findViewById(R.id.logTokenButton);
        logTokenButton.setOnClickListener(this);
    }

    @Override
    public void onClick(View view) {
        if(view.getId()==R.id.subscribeButton){
            FirebaseMessaging.getInstance().subscribeToTopic("any");
            Log.d("main", "Subscribed to news topic");
        }
        else if(view.getId()==R.id.logTokenButton){
            Log.d("main", "InstanceID token: " + FirebaseInstanceId.getInstance().getToken());
        }
    }
}
Run your project
Now, you can try and run it in your android device to check out the firebase cloud messaging.
Send Push Notification
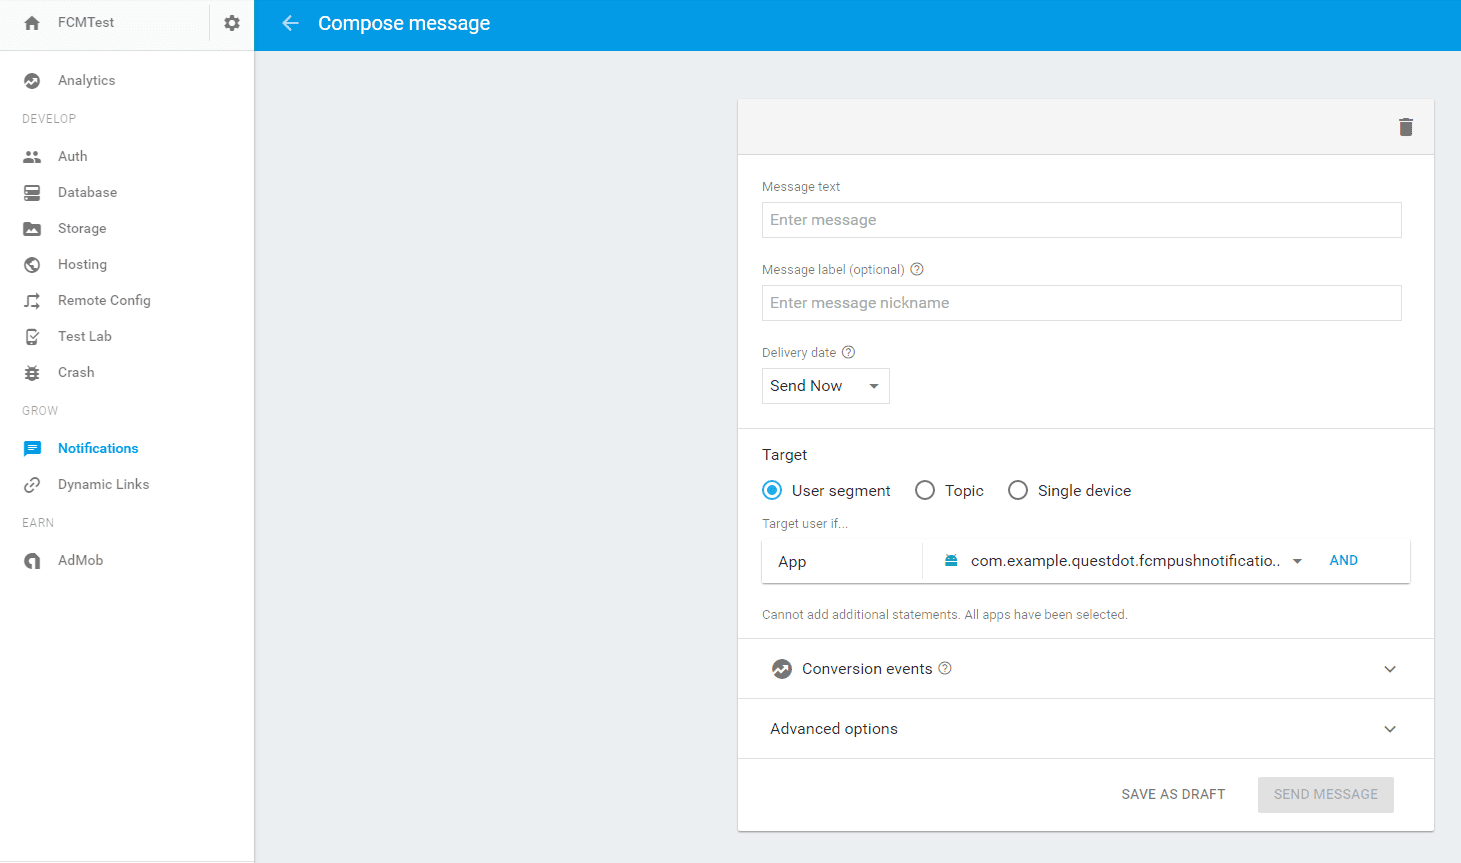
Go to Firebase Console and send push notification now. Go to notification section from left hand side and enter message text and label. And select what target you wan to push.
Yea…. you are successfully to create a push notification.
