Android Sliding Pane Side Menu Tutorial

Android provide the sliding pane which is side menu to let the user to navigate different activity. Android Sliding pane is the older version of Navigation Drawer before material design is coming out and it is slightly different which it does not overlay the activity. Besides, it is a good replacement navigation drawer if you dont want to overlay the activity. It also can combine with the fragment same usage as navigation drawer. In this tutorial, I will tell you how to use android sliding pane side menu in your new android project. Just need to follow what i do.
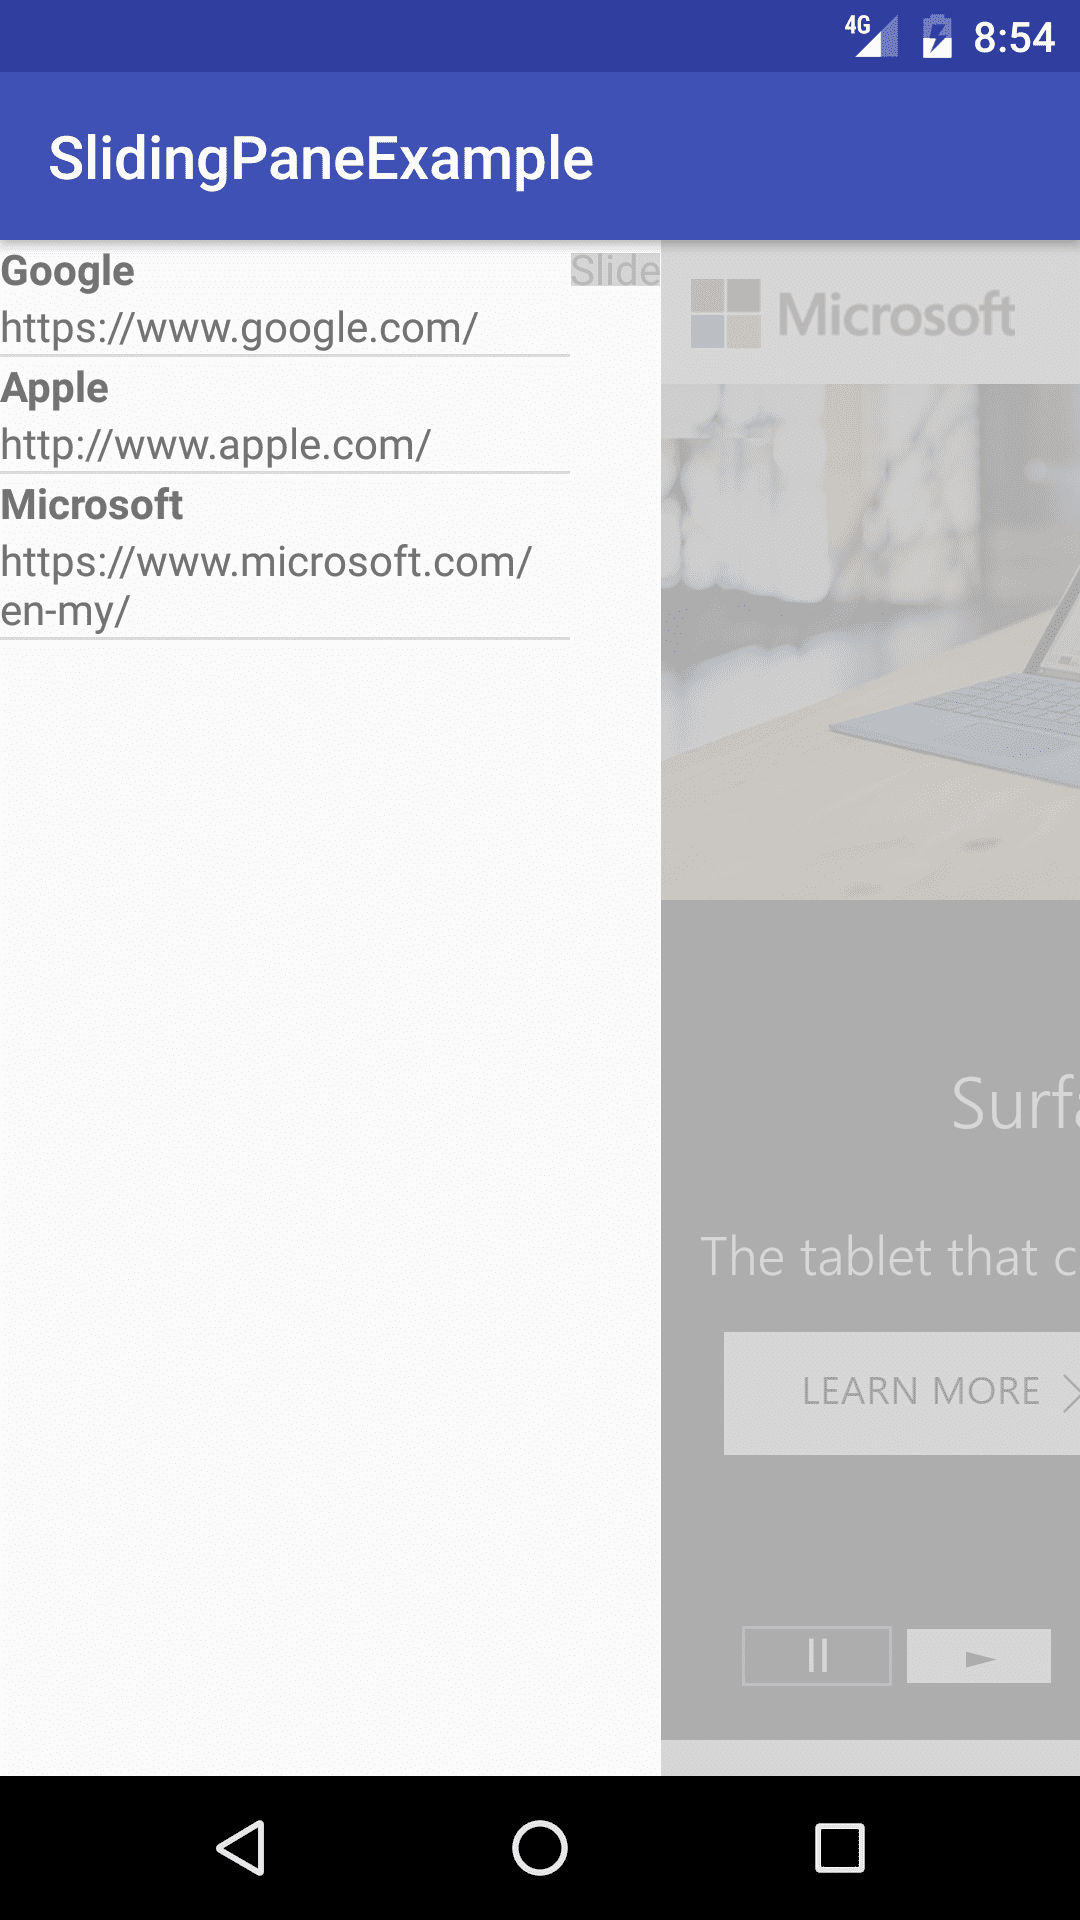
Sample Screen
Creating a New Project
1. Open Android Studio IDE in your computer.
2. Create a new project and Edit the Application name to “SlidingPaneExample”.
(Optional) You can edit the company domain or select the suitable location for current project tutorial. Then click next button to proceed.
3. Select Minimum SDK (API 15:Android 4.0.3 (IceCreamSandwich). I choose the API 15 because many android devices currently are support more than API 15. Click Next button.
4. Choose “Empty Activity” and Click Next button
5. Lastly, press finish button.
Create 2 Fragments
Right click your project name and create blank fragments for content and sliding pane. For the name you can give the first fragment “SlidingPaneFragment” while another fragment “ContentFragment”. It will automatic create the xml file for both fragments.
Edit ContentFragment xml layout
At first, we go to edit the content fragment xml layout, you can follow the source code in the below.
<?xml version="1.0" encoding="utf-8"?>
<LinearLayout xmlns:android="http://schemas.android.com/apk/res/android"
    android:layout_width="match_parent"
    android:layout_height="match_parent"
    android:orientation="horizontal" >

    <TextView
        android:text="Slide"
        android:layout_width="wrap_content"
        android:layout_height="wrap_content"
        android:id="@+id/textView"
         />

    <WebView android:id="@+id/webPage"
             android:layout_height="match_parent"
             android:layout_width="match_parent"/>

</LinearLayout>
Edit SlidingPaneFragment xml layout
After that go to edit another fragment layout for the sliding pane how you want it to look like.
<?xml version="1.0" encoding="utf-8"?>
<LinearLayout xmlns:android="http://schemas.android.com/apk/res/android"
    android:layout_width="match_parent"
    android:layout_height="match_parent"
    android:orientation="vertical" >


    <ListView  android:id="@+id/bookList"
               android:layout_width="match_parent"
               android:layout_height="match_parent"/>
</LinearLayout>
Create a xml layout for sliding pane listview item
<?xml version="1.0" encoding="utf-8"?>
<RelativeLayout xmlns:android="http://schemas.android.com/apk/res/android"
    android:layout_width="match_parent"
    android:layout_height="match_parent" >


    <TextView  android:id="@+id/bkmName" android:textStyle="bold"
               android:layout_width="wrap_content"
   			   android:layout_height="wrap_content"
   			   android:layout_alignParentLeft="true"/>


    <TextView android:id="@+id/bkmLink"
        	  android:layout_width="wrap_content"
   			  android:layout_height="wrap_content"
   			  android:layout_alignParentLeft="true"
   			  android:layout_below="@id/bkmName" />

</RelativeLayout>
Edit activity_main.xml layout
In your activity_main layout add the sliding pane layout and both fragments on it.
<android.support.v4.widget.SlidingPaneLayout
    xmlns:android="http://schemas.android.com/apk/res/android"
    xmlns:tools="http://schemas.android.com/tools"
    android:layout_width="match_parent"
    android:layout_height="match_parent"
    android:id="@+id/sp" >


    <fragment android:id="@+id/leftpane"
              android:name="com.questdot.slidingpaneexample.SlidingPaneFragment"
              android:layout_width="190dp"
      		  android:layout_height="match_parent"
              android:layout_gravity="left"
        tools:layout="@layout/sliding_pane_layout" />


    <fragment android:id="@+id/rightpane"
              android:name="com.questdot.slidingpaneexample.ContentFragment"
              android:layout_width="350dp"
      		  android:layout_height="match_parent"
              android:layout_gravity="right"
              android:layout_weight="1"
        tools:layout="@layout/content_fragment_layout" />

</android.support.v4.widget.SlidingPaneLayout>
Create a Modal class
Add a new modal class name “Bookmark”.
public class Bookmark {
    public String name;
    public String link;

	public Bookmark(String name, String link) {
        this.name = name;
        this.link = link;
    }
}
Create an Interface
After that, create the interface “BookmarkListener” in your project.
public interface BookmarkListener {
    public void onChangeBookmark(String bookmark);
}
Add a new Adapter
By creating the new adapter, right click the project and create a new class name “LinkAdapter”. Then follow the source code below.
public class LinkAdapter extends ArrayAdapter<Bookmark> {

	private List<Bookmark> bookList;
	private Context ctx;

	public LinkAdapter(List<Bookmark> bookList, Context ctx) {
		super(ctx, R.layout.link_list_item, bookList);
		this.ctx = ctx;
		this.bookList = bookList;
	}

	@Override
	public int getCount() {
		return bookList.size();
	}

	@Override
	public Bookmark getItem(int position) {
		return bookList.get(position);
	}

	@Override
	public long getItemId(int position) {
		return bookList.get(position).hashCode();
	}

	@Override
	public View getView(int position, View convertView, ViewGroup parent) {
		View v = convertView;

		if ( v == null) {
			LayoutInflater inf = (LayoutInflater) ctx.getSystemService(Context.LAYOUT_INFLATER_SERVICE);
			v = (View) inf.inflate(R.layout.link_list_item, null);
			TextView tName = (TextView) v.findViewById(R.id.bkmName);
			TextView tlink = (TextView) v.findViewById(R.id.bkmLink);

			tName.setText(bookList.get(position).name);
			tlink.setText(bookList.get(position).link);
		}

		return v;
	}


}
Edit ContentFragment class
Go to this class and edit it to load the web url in the webview when you click the listview from sliding pane.
public class ContentFragment extends Fragment {

	private WebView webView;

	@Override
	public View onCreateView(LayoutInflater inflater, ViewGroup container,
							 Bundle savedInstanceState) {

		View v = inflater.inflate(R.layout.content_fragment_layout, container, false);
		webView = (WebView) v.findViewById(R.id.webPage);
		webView.getSettings().setJavaScriptEnabled(true);
		setHasOptionsMenu(true);
		return v;
	}


	public void setBookmark(String link) {
		if (link != null) {
			System.out.println("loading url");
			webView.loadUrl(link);
		}
	}


}
Edit SlidingPaneFragment Class
After that, go to edit your sliding pane fragment class to display the bookmark list and click event in this fragment.
public class SlidingPaneFragment extends Fragment {

	private List<Bookmark> bookmarkList = new ArrayList<Bookmark>();


	@Override
	public void onCreate(Bundle savedInstanceState) {
		super.onCreate(savedInstanceState);
		init();
	}


	@Override
	public View onCreateView(LayoutInflater inflater, ViewGroup container,
							 Bundle savedInstanceState) {

		View v = inflater.inflate(R.layout.sliding_pane_layout, container, true);
		ListView lView = (ListView) v.findViewById(R.id.bookList);
		LinkAdapter la = new LinkAdapter(bookmarkList, getActivity());
		lView.setAdapter(la);
		lView.setOnItemClickListener(new AdapterView.OnItemClickListener() {

			@Override
			public void onItemClick(AdapterView<?> parent, View view, int position,
									long id) {
				( (BookmarkListener) getActivity()).onChangeBookmark( bookmarkList.get(position).link );
				((MainActivity)getActivity()).pane.closePane();
			}
		});
		setHasOptionsMenu(true);
		return v;
	}


	private void init() {
		bookmarkList.add(new Bookmark("Google", "https://www.google.com/"));
		bookmarkList.add(new Bookmark("Apple", "http://www.apple.com/"));
		bookmarkList.add(new Bookmark("Microsoft", "https://www.microsoft.com/en-my/"));
	}


}
Edit MainActivity.java class
Go to your mainactivity.java class and implements the panelslide listener so you can slide the menu from the edge of the screen.
public class MainActivity extends AppCompatActivity implements BookmarkListener{
   SlidingPaneLayout pane;


   @Override
   protected void onCreate(Bundle savedInstanceState) {
      super.onCreate(savedInstanceState);
      setContentView(R.layout.activity_main);
      pane = (SlidingPaneLayout) findViewById(R.id.sp);
      pane.setPanelSlideListener(new PaneListener());

      if (!pane.isSlideable()) {
         getFragmentManager().findFragmentById(R.id.leftpane).setHasOptionsMenu(false);
         getFragmentManager().findFragmentById(R.id.rightpane).setHasOptionsMenu(true);
      }
   }


   private class PaneListener implements SlidingPaneLayout.PanelSlideListener {

      @Override
      public void onPanelClosed(View view) {
         System.out.println("Panel closed");

         getFragmentManager().findFragmentById(R.id.leftpane).setHasOptionsMenu(false);
         getFragmentManager().findFragmentById(R.id.rightpane).setHasOptionsMenu(true);
      }

      @Override
      public void onPanelOpened(View view) {
         System.out.println("Panel opened");
         getFragmentManager().findFragmentById(R.id.leftpane).setHasOptionsMenu(true);
         getFragmentManager().findFragmentById(R.id.rightpane).setHasOptionsMenu(false);
      }

      @Override
      public void onPanelSlide(View view, float arg1) {
         System.out.println("Panel sliding");
      }

   }


   @Override
   public void onChangeBookmark(String bookmark) {

      ContentFragment f = (ContentFragment) getFragmentManager().findFragmentById(R.id.rightpane);
      f.setBookmark(bookmark);

   }

}
Dont Forget
Add permission internet because i am using webview to demostrate.
<uses-permission android:name="android.permission.INTERNET"/>
Run your Project
Finally, you can run your project in your emulator to use the sliding panel and see whats different with navigation drawer.