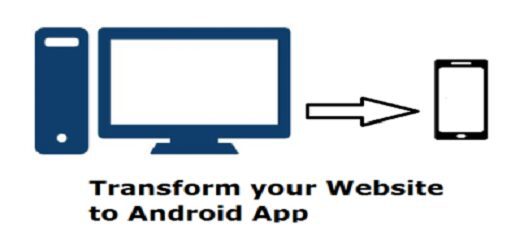
How to transform your website become Android app

Some of you may want to transform or convert your website become android app but do not have too much of time and skill to complete it in a given time. To convert a website to an Android application, it is just pretty easy to transform it, you just need half to 1 hour to complete it. In this tutorial, I will tell you how to transform your website to android app in Android Studio IDE. You just need to use a WebView in Android Studio. What is Webview? Webview is a browser bundled inside of a mobile app that allow the developer to render the website in the mobile app. By using a webview, it allows mobile apps to use the web technology such as html, javacript.
Benefit
- Save cost, you dont need to spend money to hire developer to build an android app for your website.
- Save time, it help you to save alot of development time.
- It will be compatible to most of the android devices.
Pre-requisites
1. Download Android Studio IDE.
2. Prepare a website that have responsive web design.
Creating a New Project
1. Open Android Studio IDE in your computer.
2. Create a new project and Edit the Application name to “WebViewExample”.
(Optional) You can edit the company domain or select the suitable location for current project tutorial. Then click next button to proceed.
3. Select Minimum SDK (API 15:Android 4.0.3 (IceCreamSandwich). I choose the API 15 because many android devices currently are support more than API 15. Click Next button.
4. Choose “Empty Project” and Click Next button
5. Lastly, press finish button.
Edit activity_main.xml Layout
Go to your activity_main.xml from layout folder, change your relative layout to webview.
<?xml version="1.0" encoding="utf-8"?>
<LinearLayout xmlns:android="http://schemas.android.com/apk/res/android"
    android:orientation="vertical"
    android:layout_width="fill_parent"
    android:layout_height="fill_parent"
    >
    <WebView android:id="@+id/webview1"
        android:layout_width="fill_parent"
        android:layout_height="fill_parent"
        android:layout_weight="1" />
</LinearLayout>
Edit MainActivity.java
Go to your MainActivity.java and copy below code, your activity should be extends Activity instead of AppCompatActivity because Activity does not have toolbar.
WebSettings
– It is manage the setting of the WebView.
setJavaScriptEnabled()
– To enable or disable JavaScript ability in your WebView.
shouldOverrideUrlLoading(WebView view, String url)
– To take the control of loading the url in the WebView. It will load the url inside the WebView If the user navigate to another page.
onPageFinished(WebView view, String url)
– To notify the client for the url is finish loaded.
loadurl()
– To load your website in the WebView.
package com.example.questdot.webviewexample;

import android.app.Activity;
import android.app.ProgressDialog;
import android.os.Bundle;
import android.util.Log;
import android.webkit.WebSettings;
import android.webkit.WebView;
import android.webkit.WebViewClient;
import android.widget.Toast;

public class MainActivity extends Activity {
    private WebView webview;
    private static final String TAG = "Main";
    private ProgressDialog progressBar;
    @Override
    public void onCreate(Bundle savedInstanceState) {
        super.onCreate(savedInstanceState);

        setContentView(R.layout.activity_main);

        this.webview = (WebView)findViewById(R.id.webview1);

        WebSettings settings = webview.getSettings();
        settings.setJavaScriptEnabled(true);
        webview.setScrollBarStyle(WebView.SCROLLBARS_OUTSIDE_OVERLAY);

        progressBar = ProgressDialog.show(this, "WebView Example", "Loading...");

        webview.setWebViewClient(new WebViewClient() {
            public boolean shouldOverrideUrlLoading(WebView view, String url) {
                Log.i(TAG, "Processing");
                view.loadUrl(url);
                return true;
            }

            public void onPageFinished(WebView view, String url) {
                Log.i(TAG, "Finished");
                if (progressBar.isShowing()) {
                    progressBar.dismiss();
                }
            }

            public void onReceivedError(WebView view, int errorCode, String description, String failingUrl) {
                Log.e(TAG, "Error: " + description);
                Toast.makeText(getApplicationContext(), "Oh no! " + description, Toast.LENGTH_SHORT).show();

            }
        });
        webview.loadUrl("https://questdot.com");
    }
}
Edit AndroidManifest.xml
Last, dont forget to add INTERNET permission in your android manifest file. If you no adding the permission in manifest, the content will not able to load when you running the project.
<?xml version="1.0" encoding="utf-8"?>
<manifest xmlns:android="http://schemas.android.com/apk/res/android"
    package="com.example.questdot.webviewexample">

    <application
        android:allowBackup="true"
        android:icon="@mipmap/ic_launcher"
        android:label="@string/app_name"
        android:supportsRtl="true"
        android:theme="@style/AppTheme">
        <activity android:name=".MainActivity">
            <intent-filter>
                <action android:name="android.intent.action.MAIN" />

                <category android:name="android.intent.category.LAUNCHER" />
            </intent-filter>
        </activity>
    </application>
    <uses-permission android:name="android.permission.INTERNET" />
</manifest>
Run your project
Now, you are able to run the application in your android device or emulator.


