Integrate Google Map v2 on Android
Google Map v1 has been deprecated and its time migrate to the Google Map v2. Google Map API allow the android application use the major feature of Google Map such as Add Marker in the Google Map, track location, search location and more. Integrate the google map api into your android app is good for showing your business location or implement some taxi app such as uber. In this tutorial, I will teach you on how to integrate google map v2 on android application so that you able to use it.
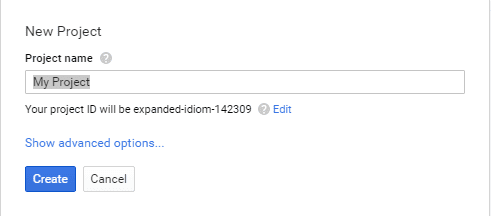
Create a Project in Google Console
Now, go to the google console https://console.developers.google.com/ to create a new google console project for your android application.
Generate Google Map API Key
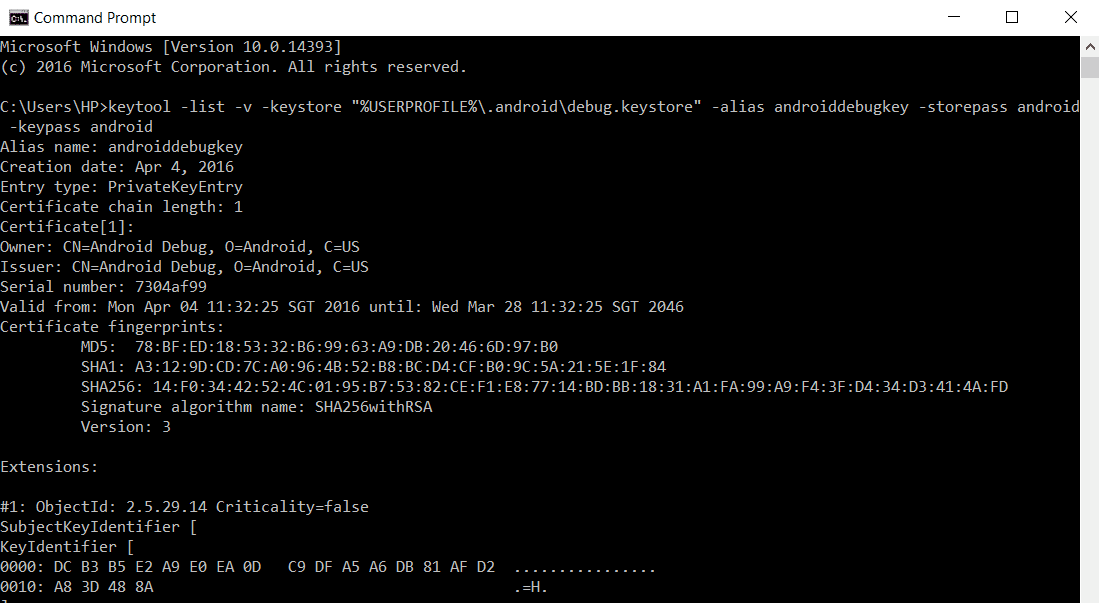
Open your command prompt and use java keytool to generate SHA-1 fingerprint. You can following the example command line in the below.
For Windows
keytool -list -v -keystore “%USERPROFILE%\.android\debug.keystore” -alias androiddebugkey -storepass android -keypass android
For Mac OS X or Linux
keytool -list -v -keystore ~/.android/debug.keystore -alias androiddebugkey -storepass android -keypass android
Enable Google Map Android API and Create a Credential for Android API Key
Find the Google Map Android API and enable it, after that create a android api key for your project. Add package name and SHA-1 fingerprint to restrict usage to your android app.
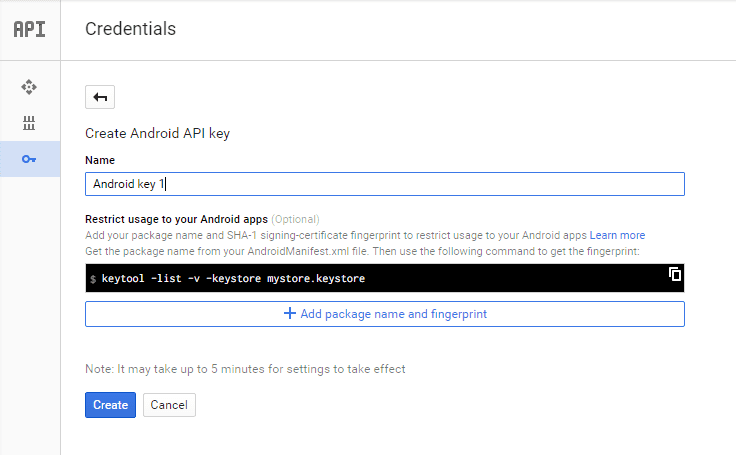
After create the credential, you will get your Android API Key.

Creating a New Project
1. Open Android Studio IDE in your computer.
2. Create a new project and Edit the Application name to “GoogleMapApiExample”.
(Optional) You can edit the company domain or select the suitable location for current project tutorial. Then click next button to proceed.
3. Select Minimum SDK (API 15:Android 4.0.3 (IceCreamSandwich). I choose the API 15 because many android devices currently are support more than API 15. Click Next button.
4. Choose “Empty Activity” and Click Next button
5. Lastly, press finish button.
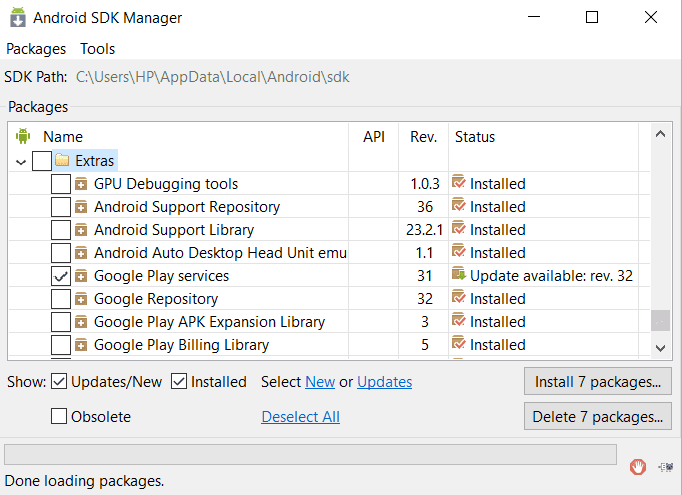
Install Google Play Services SDK
Launch your SDK manager in the android studio and download the Google Play Services SDK as the image show below.
Add new Dependency
Go to build.gradle (Module:app) and add the following code to your dependency section.
compile 'com.google.android.gms:play-services-maps:7.8.0'
compile 'com.google.android.gms:play-services-location:7.8.0'
Add google_maps_api.xml
Create a xml file and name it as “google_maps_api.xml” in your res > values folder. After create the file, copy the source code and insert the android api key.
<resources>

    <string name="google_maps_key" templateMergeStrategy="preserve" translatable="false">YOUR_KEY</string>
</resources>
Edit AndroidManifest.xml
Add new permission and feature in the manifest file so it can work well later. After that, also add the meta-data it able to get your api key.
<?xml version="1.0" encoding="utf-8"?>
<manifest xmlns:android="http://schemas.android.com/apk/res/android"
    package="com.example.questdot.googlemapapiexample">
    <uses-feature
        android:glEsVersion="0x00020000"
        android:required="true"/>

    <uses-permission android:name="android.permission.INTERNET" />
    <uses-permission android:name="android.permission.ACCESS_FINE_LOCATION" />
    <application
        android:allowBackup="true"
        android:icon="@mipmap/ic_launcher"
        android:label="@string/app_name"
        android:supportsRtl="true"
        android:theme="@style/AppTheme">
        <activity android:name=".MainActivity">
            <intent-filter>
                <action android:name="android.intent.action.MAIN" />

                <category android:name="android.intent.category.LAUNCHER" />
            </intent-filter>
        </activity>

        <meta-data
            android:name="com.google.android.geo.API_KEY"
            android:value="@string/google_maps_key" />
    </application>

</manifest>
Edit activity_main.xml
Go to your activity_main.xml and add the google map fragment inside your layout so it able to show the map later.
<?xml version="1.0" encoding="utf-8"?>
<RelativeLayout xmlns:android="http://schemas.android.com/apk/res/android"
    xmlns:tools="http://schemas.android.com/tools"
    android:layout_width="match_parent"
    android:layout_height="match_parent"
    android:paddingBottom="@dimen/activity_vertical_margin"
    android:paddingLeft="@dimen/activity_horizontal_margin"
    android:paddingRight="@dimen/activity_horizontal_margin"
    android:paddingTop="@dimen/activity_vertical_margin"
    tools:context="com.example.questdot.googlemapapiexample.MainActivity">

    <fragment xmlns:android="http://schemas.android.com/apk/res/android"
        xmlns:map="http://schemas.android.com/apk/res-auto"
        xmlns:tools="http://schemas.android.com/tools"
        android:id="@+id/map"
        android:name="com.google.android.gms.maps.SupportMapFragment"
        android:layout_width="match_parent"
        android:layout_height="match_parent"
        tools:context="com.questdot.testmap.MapsActivity" />

</RelativeLayout>
Edit MainActivity.java class
Go to mainactiviti.java class and paste the following source code, the following source code able to get your current location and also add marker to the map. You can customize later.
package com.example.questdot.googlemapapiexample;

import android.location.Location;
import android.support.v7.app.AppCompatActivity;
import android.os.Bundle;

import com.google.android.gms.maps.CameraUpdateFactory;
import com.google.android.gms.maps.GoogleMap;
import com.google.android.gms.maps.OnMapReadyCallback;
import com.google.android.gms.maps.SupportMapFragment;
import com.google.android.gms.maps.model.LatLng;
import com.google.android.gms.maps.model.MarkerOptions;

public class MainActivity extends AppCompatActivity {
    private GoogleMap mMap;
    @Override
    protected void onCreate(Bundle savedInstanceState) {
        super.onCreate(savedInstanceState);
        setContentView(R.layout.activity_main);
        setUpMapIfNeeded();

    }


    private void setUpMapIfNeeded() {
        // Do a null check to confirm that we have not already instantiated the map.
        if (mMap == null) {
            // Try to obtain the map from the SupportMapFragment.
            mMap = ((SupportMapFragment) getSupportFragmentManager().findFragmentById(R.id.map))
                    .getMap();
            mMap.setMyLocationEnabled(true);
            // Check if we were successful in obtaining the map.
            if (mMap != null) {
                addMarker();

                mMap.setOnMyLocationChangeListener(new GoogleMap.OnMyLocationChangeListener() {

                    @Override
                    public void onMyLocationChange(Location arg0) {
                        // TODO Auto-generated method stub


                        //getCurrentLocation
                        mMap.addMarker(new MarkerOptions().position(new LatLng(arg0.getLatitude(), arg0.getLongitude())).title("It's Me!"));
                    }
                });

            }
        }
    }

    private void addMarker()
    {
        mMap.addMarker(new MarkerOptions().position(new LatLng(3.150287, 101.664435)).title("Kuala Lumpur"));
        // here is marker Adding code
    }

    @Override
    protected void onResume() {
        super.onResume();
        setUpMapIfNeeded();
    }
}
Run your project
Finally, you can run the google map in your android device.
Note : if you are using emulator to run this project may cause the error because your emulator dont have google services, google map and google play.